By: Danielle Powell
Have you ever tried sending parcels to Remote or as a Return to Main and somehow lost the file? When this happens, it usually has to do with losing connection to the USB or network location. If emailing the file, those email servers involved may not allow certain file types or files beyond a set size. This can be frustrating!
If this sounds familiar to you, we now have a tool that can prevent similar scenarios and make your life a little bit easier. We call it “Remote Web Share.” It’s already been proven as a helpful tool for our office in reappraisal projects. Any clients with Remote licensing and internet connection can use it as well.
In Version 22 of CAMAvision, this Remote Web Share tool was added to the Remote checkout and Return to Main processes. This allows Remote parcel files to transfer through internet-based cloud storage, bypassing many of the complications with using USB/network/email. Rather than sending through email, the Remote Web Share uploads the file to the cloud (internet-based file storage), from where the recipient can then download that file to their own system. This works both ways – Main to Remote or Remote returning to Main. The goal? Simplicity!
Important Notes:
- In the checkout process from the Main, if a specific user is selected for “Intended Recipient,” remember to notify that user that the package is available for download. The program does not send automatic-notification.
- In the Web Packages download screen, users will be able to see any package sent specifically to that user (“Intended Recipient”), as well as, all packages sent to “[Anybody].”
- If multiple users download the same package, only one of those packages will allow Remote edits to return and check-in to the Main system.
- When CAMARemote Web Share is selected in the Checkout/Return to Main processes, the file is first created in the local temp folder of the local computer. That file is then uploaded to the cloud, and if successful, the file is deleted from the local temp folder.
- If the file is unable to upload to the cloud (e.g., no internet or connection lost), it still checks out the parcels, creates the RPK file, and leaves it in the local temp folder. That RPK file can still be transferred to the Remote or Main computer using the old-fashioned method (USB, network, or email).
If you have any questions or concerns, please contact VCS Technical Support.
In the normal checkout process for Version 22, the following dialog appears after pressing the “Checkout Parcels” button:
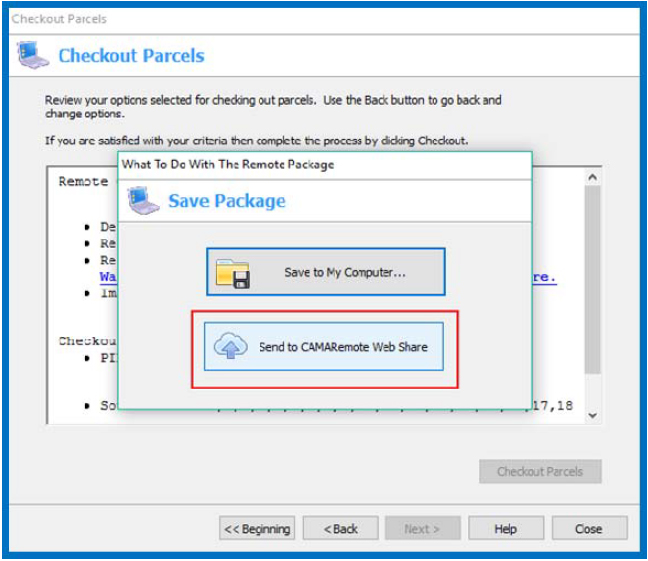
- Press the “Send to CAMARemote Web Share” button to upload the parcels to cloud.
- Press the “OK” button when the upload process is complete.
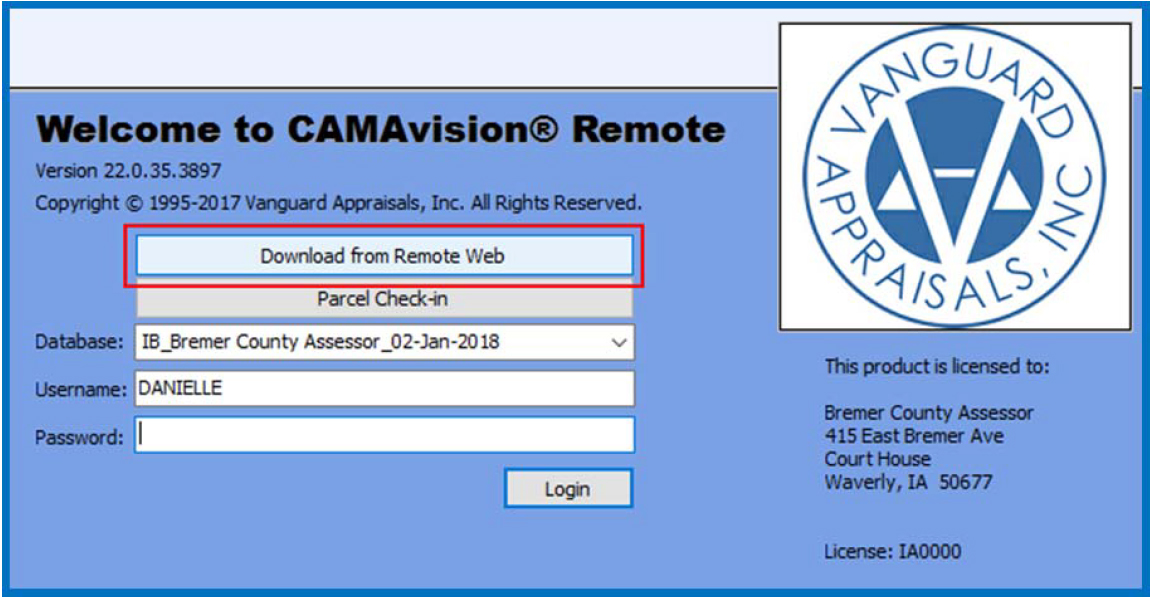
To download parcels for Remote Check-in:
- From the Remote login screen (v22+), use the “Download from Remote Web” button.
- The following dialog appears:
- Your package should appear in the list if…
- Your user name was selected as Intended Recipient in checkout process.
- “[Anybody]” was selected as Intended Recipient in checkout process.
- If your package does not appear…
- Clear User name – if it was checked out to a different user.
- Uncheck the box “Not Downloaded yet” – if it was already downloaded.
* Note: Only one version of Remote edits can return to Main. - Press the “Search” button to refresh results.
- Click on the appropriate row to highlight it in blue for selection.
- Press the “Download and Check In” button (only enables when a row is selected).
- The package downloads to your desktop, and a dialog screen appears:
- Press the “Next” button to start the check-in process.
- Press the “OK” button on the following 2 screens to complete check-in.
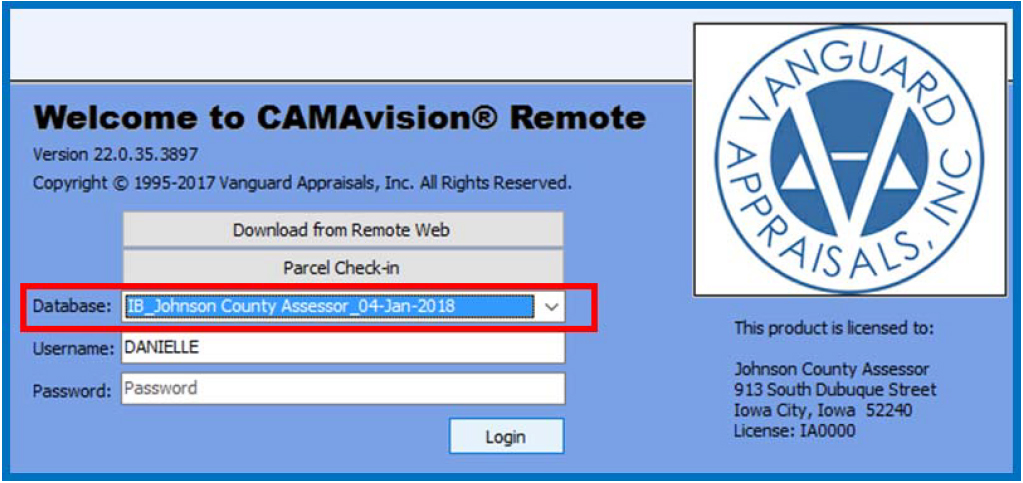
- Close the Remote Web Share screen to return to login screen with that database available.

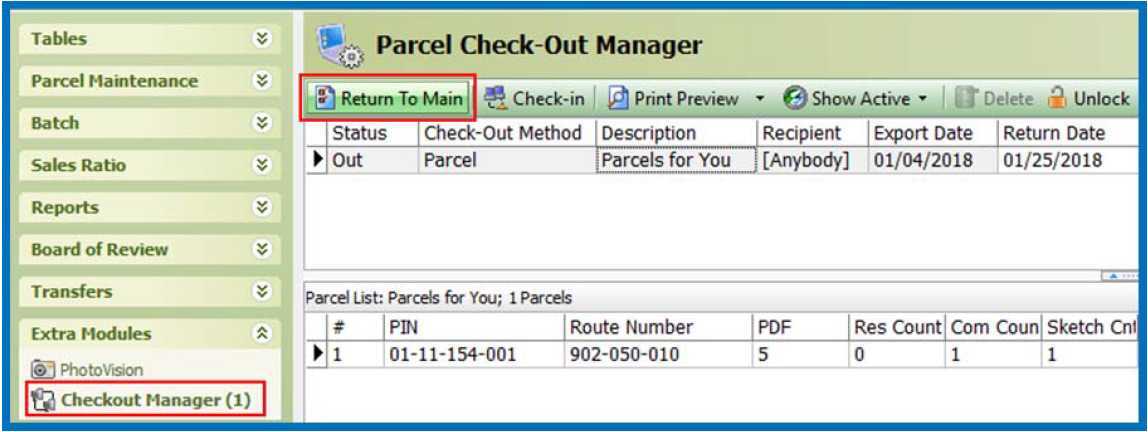
The Return to Main process to send the parcels back to the client is mostly unchanged.
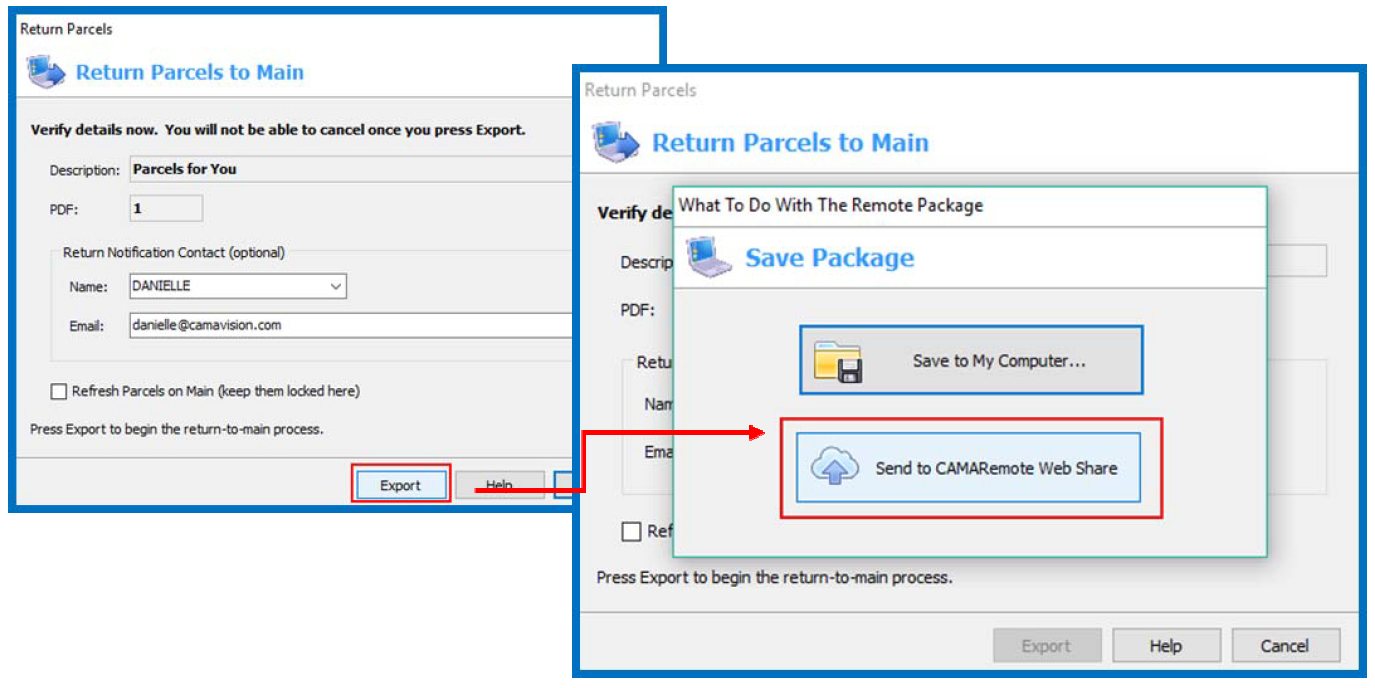
- In the Checkout Manager, press the “Return To Main” button
- Press the “Export” button in the dialog that appears.
- Click the “Send to CAMARemote Web Share” button to upload the parcels.
- Press the “OK” button on the “Process complete” dialog screen.
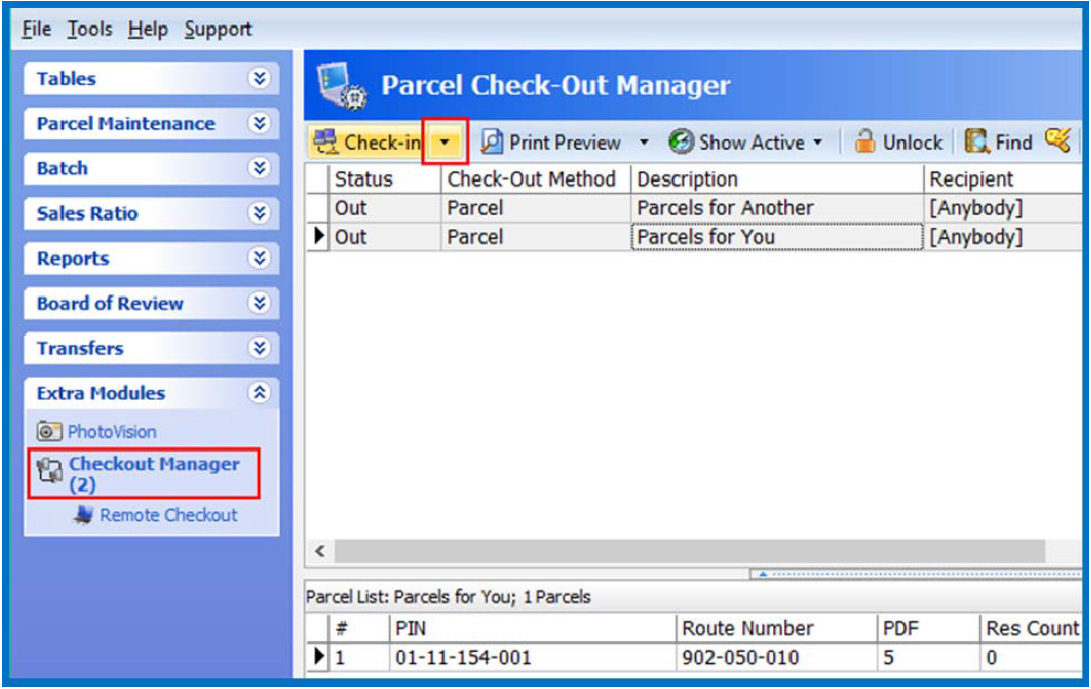
The Check-in process on the Main side is only slightly different than previous method:
- From the Checkout Manager, Press the down arrow to the right of the “Check-in” button.
- Select “Web Share Check-in” from the drop-down menu:
- The following dialog appears:
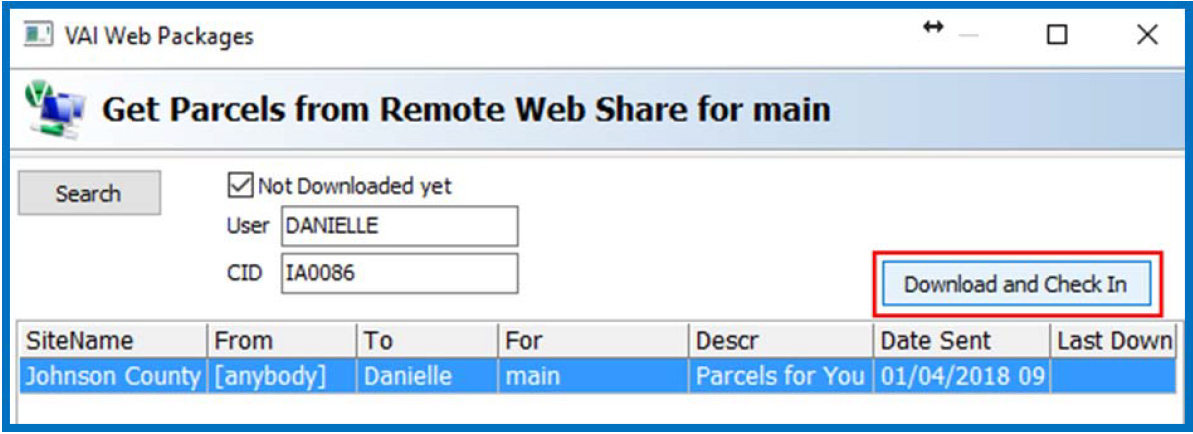
- Click the row to highlight it in blue for selection.
- Press the “Download and Check In” button to start the check-in process (only enables when a row is selected).
- Press the “OK” button on the next 2 dialog screens.
- The parcels are now checked in. Repeat steps 4-6 if additional packages are ready for check-in, and close the window when finished to start reviewing those parcels.